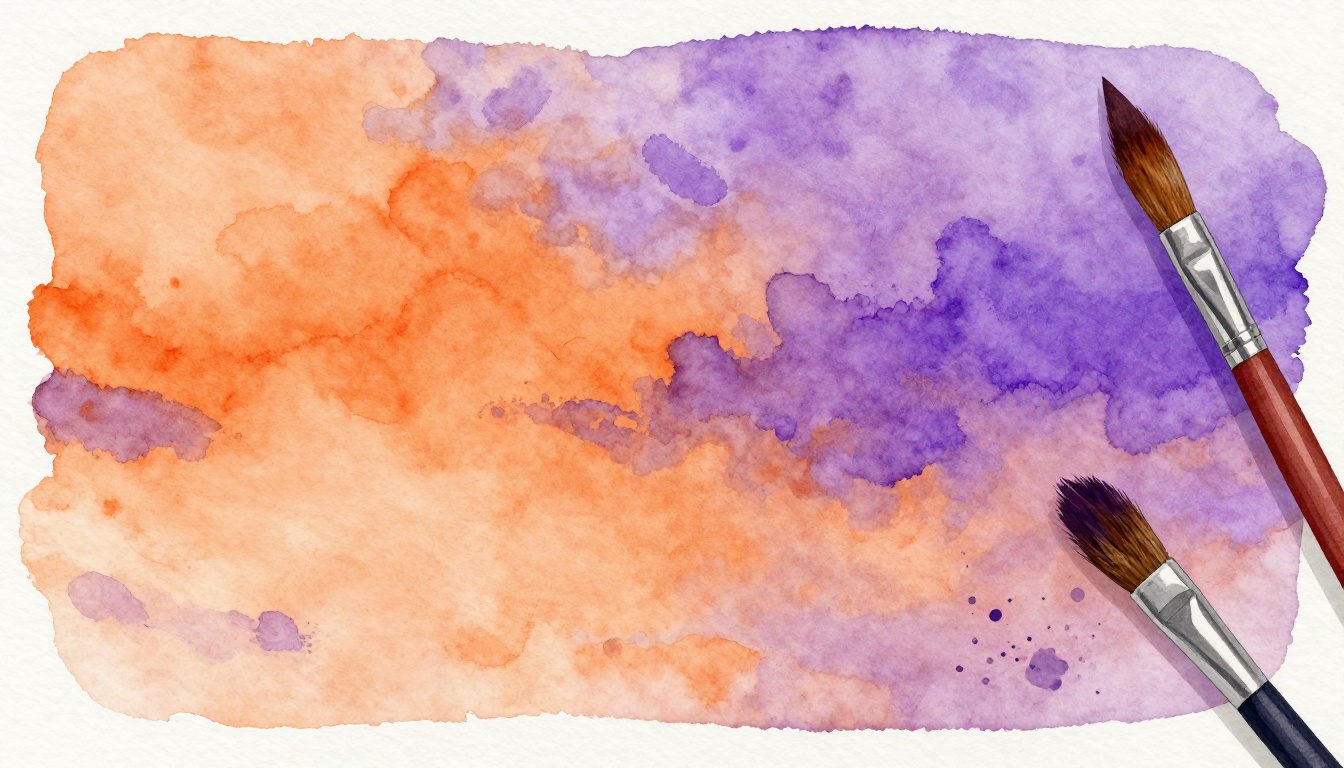
Imagine capturing a sunset sky where oranges melt into purples without a single harsh edge. That dreamy blend seems impossible with watercolor, right? But the wet-on-wet technique makes it simple: you brush wet paint onto wet paper, and colors flow together naturally.
You’ve likely hit frustration before. Dry brush strokes leave stark lines that ruin soft gradients. Meanwhile, paints puddle into mud. This method fixes both issues. It creates effortless smooth transitions, perfect for skies, oceans, or even skin tones.
Colors spread on their own, so you get pro results fast. No more scrubbing mistakes or starting over. Instead, enjoy the magic as layers build depth.
In this post, we’ll walk through everything step by step. First, gather the right supplies. Then, set up your workspace for success. Next comes the core steps to nail those soft gradients. We’ll cover common fixes if things go wrong. Finally, share practice tips to make it second nature.
Grab your paints, paper, and brushes now. Follow along, and you’ll paint like a pro by the end. Let’s dive in.
Stock Up on These Key Supplies for Flawless Wet-on-Wet Results
You can create stunning gradients, but only with the right tools. Cheap paper buckles under water. Stiff brushes leave streaks. So, start here. Grab these beginner-friendly items first. They handle wetness well and deliver smooth blends every time.
Stock up on cold-press watercolor paper at least 140lb. This weight absorbs water without warping or buckling. Lighter sheets turn into soggy messes. Next, pick quality synthetic brushes in round and flat shapes. They hold more water than stiff ones, so paints flow freely. Tube watercolors work fine, even student-grade ones like Winsor & Newton or Daniel Smith. Squeeze them into a simple palette for easy mixing.
Don’t forget basics. Keep two water jars handy: one clean for rinsing, one for dirty water. Paper towels soak up excess fast. Use masking tape to secure your paper flat. Optional frisket masks areas you want crisp later.
For budget buys, check art stores for starter kits. Test everything first. Wet a scrap of paper. See if it stays flat. Load a brush. Check if it keeps a sharp point. These steps save headaches.
Choosing the Right Paper and Brushes
Pick paper and brushes with care. They control how wet paint behaves. Cold-press paper suits wet-on-wet best. Its texture grabs paint and lets colors spread softly. Hot-press feels smooth, but it repels water too much. So, gradients turn spotty.
Paper weight matters next. Go for 140lb or higher. Thinner options (90lb) can’t handle pooling water. They curl and tear. Heavier stock stays taut, even after minutes of wetness.
| Paper Type | Pros | Cons |
|---|---|---|
| Cold-Press | Absorbs well; natural texture for blends | Slightly rough for fine lines |
| Hot-Press | Smooth surface; good for detail | Less absorbent; edges stay sharp |
Brushes come next. Synthetics beat natural hair for beginners. They stay soft and springy in water. Natural sable holds paint well, but costs more and wears out fast.
Start with a #8 round brush for most gradients. It covers broad areas yet points for edges. Add a #2 round for details. Flats (1/2-inch) block shapes cleanly.
| Brush Type | Pros | Cons |
|---|---|---|
| Synthetic | Affordable; holds water; easy clean | Less “snap” than natural |
| Natural | Best paint release; sharp point | Expensive; animal products |
Care for brushes right. Rinse after use. Reshape tips on a towel. Store upright to dry. This keeps them ready for flawless strokes.
Test your setup now. Dip brush in water. Stroke on paper. Watch paint feather out. Adjust as needed. You’ll see pro results soon.
Set the Stage: Prep Steps That Make Wet-on-Wet a Breeze
Before you add paint, get your space ready. This setup prevents slips and warped paper. It also lets colors blend smoothly for those soft gradients. Start by taping your paper to a sturdy board. Use masking tape on all four edges. Pull it taut so the sheet stays flat as water soaks in. Place the board on a non-slip surface, like a rubber mat. That keeps everything stable during tilts.
Control your environment next. Bright, even lighting helps you spot wet spots. If humidity runs high, use a fan on low to dry air gently. Otherwise, paper stays too wet too long. Mix your colors ahead in the palette. Pick analogous pairs, such as blue fading to purple. Load them into wells so you grab them fast. Paint dries quick, so work in short bursts. Aim for five minutes max from wetting to first stroke.
These steps build your confidence. You’ll see the paper gleam just right. Now, focus on wetting the paper evenly. Do this well, and gradients flow without mud or streaks.
Mastering Even Paper Wetting Without Over-Soaking
Wet your paper first with clean water. Use a large brush or spray bottle for speed. Start at the top edge. Brush or mist downward in even strokes. Tilt the board slightly at a 15-degree angle. Water runs off excess instead of pooling.
Blot extra moisture right away. Press a paper towel flat across the surface. Lift straight up. No rubbing, or you’ll create uneven patches. Check for perfect wetness now. The paper looks shiny and taut, like stretched silk. It holds shape but sheds drops if you tap the board.
Common errors pop up fast. Centers puddle when you over-spray. Fix it by tilting more and blotting again. Edges dry first if you rush. Mist them extra, then blend with the brush.
Here’s the step-by-step process:
- Fill a clean jar with room-temperature water.
- Dip your largest round brush fully.
- Stroke from top to bottom, overlapping passes.
- Tilt board toward you.
- Blot with folded paper towel in 10-second presses.
- Wait 30 seconds. Test by touching; it feels cool and slick.
This even wetness sets up gradient success. Paint spreads wide without beading up. Colors mingle softly, just like a pro sky. Practice on scraps first. Soon, you’ll nail it every time.
Your Foolproof Guide to Painting Silky Soft Gradients
Now you have your supplies and prepped paper ready. Let’s paint those silky soft gradients. This guide breaks down the core process into simple steps. Start with a light base wash. Drop in mid-tones while everything stays wet. Nudge blends with a clean brush. Add darks last for depth. Work fast because paints dry in 1-2 minutes per section. Practice on scraps first. You’ll layer colors without mud because wet paper spreads them naturally. Try horizontal strokes for skies or vertical tilts for sunsets. Experiment with your own color combos once you get the hang of it.
Build a Sky Gradient from Light to Deep Blue
Grab your cold-press paper, taped flat and evenly wet. Use a #8 round synthetic brush and tube paints like Winsor & Newton. Recap: two water jars, paper towels nearby.
Start at the horizon. Load yellow ochre thinly. Brush a light base wash across the bottom third. Keep strokes horizontal for even coverage. Tilt the board slightly away from you so excess runs off.
Next, rinse your brush clean. Drop cerulean blue into the wet yellow at mid-level. Watch it spread softly. Blend with gentle horizontal strokes. Go left to right, then back. Do not scrub; just guide the flow.
Deepen the top now. Mix ultramarine blue darker. Drop it along the upper edge. Pull color downward lightly with the damp brush. Add more if needed, but stop after 90 seconds. Let it settle.
For realism, sprinkle salt on damp areas. It creates cloudy textures like distant clouds. Blot gently after 30 seconds to lift. Or crumple tissue, press into wet paint, and lift for soft whites. These tricks add interest without harsh lines.
Test a vertical version too. Tilt side to side for ocean waves. Your sky glows smooth now.
Create a Sunset Glow with Seamless Color Shifts
Pick analogous colors for harmony: yellow-orange, red-pink, purple. Wet paper shines ready. Use the same #8 round brush.
Lay a cadmium yellow-orange base at the bottom. Brush wide horizontal strokes. Cover the lower half evenly. Work quick before edges set.
Introduce quinacridone rose while wet. Drop it above the yellow. Tilt the board 10 degrees. Colors shift together. Blend lightly with side-to-side pulls. Avoid overworking; it dulls vibrancy.
Shift to dioxazine purple at the top. Add small drops. Feather downward with a barely damp brush. Pull just enough for seamless glow. Stop at two minutes. Let slight drying help edges soften naturally.
Finish with damp brush strokes across the whole. Lift excess from highlights. Your sunset fades smoothly from warm to cool. Practice drying stages: nudge early when glossy, feather later when sheen fades.
Go vertical for a horizon glow. Tilt left, drop colors rightward. Results stun every time.
Nudge and Feather Edges for Ultra-Smooth Transitions
Master these tweaks for pro-level softness. They fix uneven spots fast. Use a clean, wet #2 round brush.
First, soften edges. Rinse fully. Touch wet paint lightly. Feathers colors outward like smoke. Repeat along any hard lines. Timing matters: do it while glossy wet.
Tip in new colors next. Load mid-tone thinly. Touch one area. Tilt board so it spreads by gravity. For horizontal skies, tilt top-down. Vertical gradients need side tilts. Watch flow without stirring.
Practice strokes build skill. Stroke clean brush horizontally across wet base. See ripples smooth out. Then tip blue into yellow. Nudge gently rightward. Add dark at top, feather down. One minute max.
Common fix: mud from over-nudging. Blot excess immediately. Rinse brush often. These moves create ultra-smooth shifts. Your gradients look effortless. Keep practicing; you’ll nudge like instinct soon.
Fix These Sneaky Mistakes for Pro-Level Wet-on-Wet Every Time
Even with practice, wet-on-wet gradients hit snags. Muddy colors dull your sky. Blooms create ugly halos. Hard lines kill softness. Paper buckles under too much water. These issues stem from color choices, timing, or tools. However, you fix them fast. Blot excess. Rewet spots. Lift paint cleanly. Prevention works too. Pick absorbent paper. Control drying. As a result, your washes stay clean and smooth. Let’s tackle each problem now.
Stop Mud and Rescue Bloomed Washes
Mud forms when paints mix too much. Complementary colors, like red and green, turn gray-brown fast. Overworking stirs them together. Stop it by working quickly. Drop colors and tilt; don’t scrub.
Blot right away if mud appears. Press a dry paper towel firmly. Lift the mess without rubbing. For stubborn spots, crumple tissue. Dab gently to soak up color. Then, rinse your brush clean. Rewet the area with plain water. Watch mud lift as you feather outward.
Blooms happen from excess water. Colors wick back into damp edges after drying. Better paper helps first. Choose 140lb cold-press; it absorbs evenly. Control speed next. Tilt your board more. Use a fan on low if air feels thick. These steps prevent halos around your gradients.
Buckling ties to poor paper or over-soaking. Heavy stock resists waves. Blot after wetting, so paper stays taut. Your washes bloom less and hold flat.
Eliminate Hard Lines and Uneven Fades
Dry spots cause hard lines. Paint hits semi-dry paper and sticks sharp. Uneven fades follow when water pulls away fast. Check sheen often. Glossy means wet; matte spells trouble.
Rewet strategically to save it. Dip a clean #2 round brush in water. Touch the line lightly. Colors soften as moisture spreads. Spray a fine mist for big areas, then blot excess.
Feather with the brush next. Stroke outward from the edge. Pull wet paint into dry spots gently. Do this while still glossy. Timing matters; wait too long, and lines set.
Practice this drill daily:
- Wet a scrap strip evenly.
- Drop yellow base, let middle dry slightly.
- Rewet the dry band with clean brush.
- Feather blue from wet side across.
- Tilt and watch it blend smooth.
Repeat with sunset colors. In short, these fixes build pro instincts. Your gradients fade perfectly every time.
Daily Practice Routines to Nail Wet-on-Wet Mastery
Practice turns tricky wet-on-wet skills into habits. You learned the basics already. Now, commit to short daily sessions. They build muscle memory for those soft gradients. In addition, consistency speeds up your progress. So, pick one routine each day. Rotate them for variety. You’ll see smoother skies and sunsets in weeks.
Start simple. Grab your prepped paper and brushes. Set a timer for 15 minutes. Focus on one skill. Then, review what worked. This approach keeps sessions fun and effective.
Quick Gradient Strips for Edge Control
Paint narrow strips daily. Wet a 2-inch band on scrap paper. Drop yellow at one end. Add blue at the other. Tilt gently. Watch colors meet softly.
Next, vary speeds. Feather fast on glossy wet areas. Nudge slower as sheen fades. Do five strips per color pair. For example, try orange to purple.
These drills sharpen your timing. In short, hard lines vanish fast.
Color Wheel Blends to Master Harmony
Mix analogous colors from a wheel. Wet full sheets small. Lay quinacridone rose base. Drop dioxazine purple nearby. Blend with damp strokes.
Practice complements too, but sparingly. They teach mud avoidance. However, stick to neighbors first. Aim for three blends per session.
You gain confidence in shifts. Results look pro without effort.
Mini-Paintings for Full Control
Create tiny scenes in 15 minutes. Pick a 4×6 inch wet square. Build a sunset horizon. Start yellow bottom. Shift to pink, then blue top.
Add salt textures midway. Blot highlights last. Do one per day.
This builds speed under pressure. Your full gradients flow naturally.
Track Gains and Level Up
Snap photos of each piece. Keep a journal. Note what improved, like even wetting.
For advanced work, layer multi-color fades. Or add dry-brush details on wet bases. Progress shows clearly.
Share on social media. Post your strips or skies. Friends cheer you on. Therefore, you stay consistent. Improvement comes quick. Keep going.
Conclusion
You now hold the keys to the wet-on-wet technique. Right supplies keep paper flat and brushes soft. Even wetting sets the stage. Quick drops and nudges build silky gradients. Fixes blot mud fast. Daily strips sharpen your timing. Most importantly, colors flow together for pro-level softness every time.
Remember that sunset sky from the start? Oranges blend into purples without effort now. You ditch harsh lines and puddles. Instead, your washes glow smooth, like ocean waves or dreamy skies. Practice turns frustration into flow, so you paint with confidence.
Grab your brushes today. Paint your first soft gradient. Drop it in the comments below; I’d love to see your sunsets. Subscribe for glazing tips and salt textures next.
“Trust the watercolors to dance; they know the way to softness.” Keep flowing.